Showing posts with label chile. Show all posts

Friday, April 26, 2013

Protecting Against Loss During Long Term Travel (and What Travel Insurance to buy)

I wrote about getting robbed in Calama, Chile here and here. A recent comment from a reader reminded me to write this post about how to protect yourself from theft.

In a nutshell, its nearly impossible to make your travel 100% theft-proof. But you can plan so that its nothing more than an unfortunate inconvenience.


I may be the most careful, paranoid person in the world, but someone out there is smarter and is making a living out of stealing. That guy is hard to beat, unfortunately. Swami and I went through a period of retrospection during those countless bus rides immediately after the theft, where we'd keep telling each other "Never again will I do this...." or "Next time, lets not forget to scan that document...". I wanted to compile some of those lessons learned here, for when you need them, you really really need them.


Here are some tips to ensure that if a theft does occur, you get back on track quickly.

Buy Travel Insurance

Like I said before, we are incredibly glad we got trip insurance. There are plenty of companies and plans out there to choose from, but we purchased ours from worldnomads. They ended up being great to deal with and covered our losses up to the limits specified in the policy, just as they promised. The insurance we bought covered the following:

  • Things we lost - laptop, DSLR camera, lenses, tablet, other electronic accessories
  • Trip interruption - food and hotel costs for the days it to took to recover our travel documents, eg. passport, green card etc.
  • Airfare - one of us had to reschedule our flights, so the insurance covered some part of the cancelled fare/new fare.
  • Documents - passport application fees and Transportation letter fees
Keep policy number and phone number very handy!

Keep online copies of all important documents

When you lose a passport or green card, embassies will require a lot of documentation to replace them. Its best to have them handy on portable hard drives and/or online storage. Here are things to have VERY handy:
  • Passport - copy of ALL pages. Not just front or back page. We had only the front and back page and could not prove to the US embassy on what date we left the country last. We also had to prove to the Chilean police when we entered the country. We also lost all our visa stamps!
  • Other ID's - drivers license, voter ID, student ID etc. Secondary IDs are sometimes asked.
  • Financial documents - bank and credit card statements. Easy to get online, but you may not have a fast internet connection to accomplish all your online needs. I was planning to use my credit card statement to show I was at LA airport on a given date to prove my residence in the US, as supporting documentation.
  • Visas of resident country - In our case scanned copy of US green card. We had green cards, but we also had all our green card application documents on online storage. Very useful.
  • Entry/Exit stamps - When traveling abroad, whenever your passport is stamped, please take a picture with your smartphone/tablet/camera and email to yourself. You will thank yourself later. We wish we did this with our Colombia entry stamps as the US embassy asked for this.
  • Other travel and identification documents - vaccinations, yellow fever certificate (required for Bolivia), copies of tickets, important receipts etc. Marriage certificate if you are married.
  • BOARDING PASS - most important! Boarding pass stubs are very important documents to store until you are done with your trip. Just a clear picture with a smartphone will do. The US embassy wanted either this or our entry/exit stamps. We had neither and had to frantically figure out other ways to prove our exit dates.

Portable hard drives in different bags

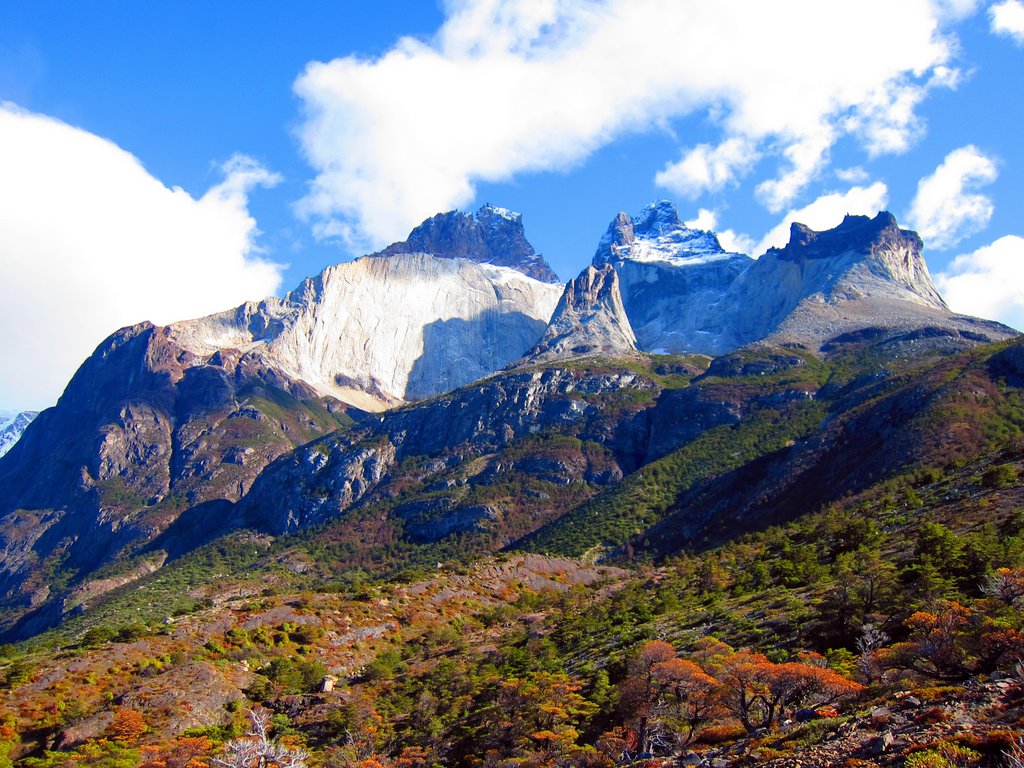
Swami did a very clever thing by getting us each a portable hard drive and backing them up regularly. By doing this, we only lost about a week's worth of pictures on our DSLR, as our laptop was lost too. Thankfully our compact camera preserved our memories from Torres Del Paine. I highly recommend carrying portable hard drives and/or pen drives placed in different bags with some backup data.

Keep a handy list of information in your travel notebook

Dont have a travel notebook? Its better to start one and keep things like 
  • frequent flyer numbers, 
  • membership numbers and 
  • coded passport numbers etc. 
  • Numbers to your credit card and debit card institution. Our stolen backpack had a bunch of cards that had to be cancelled and we didnt have access to these numbers.
  • Insurance policy number and their phone number

Cheaper and fewer gadgets

We love technology and went overboard on the expensive toys we carried. A macbook pro, a very good Nikon DSLR and a wide angle lens, a tablet, a compact camera...the list goes on. Next time I travel, I will exclusively be using a netbook or a used old laptop just for this purpose. The MBP was meant for storing large amounts of data and video/photo editing which doesnt happen as often as one would like. Infact, I am still updating the blog a year after we completed, so the MBP was not mandatory at all! I am no travel blogger or full time writer. My blog and picture editing can wait until I return from the trip. 

Protecting in layers

Some things are very painful to lose. Passports and documents like green cards. Our passport was really easy to get, but the green card process is much much more complex. And its just a card which we could have protected easily. We have a hidden wallet, but we did not use it at that time. Having fewer critical things to protect is easier than watching a heavy backpack with gadgets. I didnt lose my hand bag and I could have kept the passports in it! You dont need one of those weird wallets, but just make sure that what needs maximum protection is lightweight and close to the body.

Carry less

A lot of what we lost was unnecessary for the purpose of travel. We simply got carried away. If we had lighter, fewer packs (one big pack, one small pack, etc), caring is much easier. You lose less, cant really refute that!

If you have had a similar experience, I'd be really eager to hear about your lessons learned.

Protect your data

  • Password protect all devices. 
  • Encode all important documentation in a folder preferably. 
  • Change all email passwords and bank passwords immediately
  • Sign up for a service that tracks devices/automatically purges information (or just bring a chromebook!)


Packing list for the w trek in Patagonia

As a vegan trekking in Torres Del Paine, I wanted to share our food and gear list. All items are easily available in the chain supermarket called Unimarc. Since the W trek is a completely independent trek, you are responsible for carrying everything in and cooking for yourself.


Food list for W-trek, patagonia:


  1. Candy
  2. Trail Mix
  3. Dried Fruit
  4. Spicy peanuts
  5. Oat cereal bars
  6. Cereal mix oat cookies
  7. Costa muesli cookies
  8. Energy bars from Peru - found vegan energy bars in Lima!
  9. Soya cookies
  10. Dark chocolate
  11. Maggi stock cubes - checked ingredient list multiple times
  12. Soup packets
  13. Dried noodles
  14. Rice primavera instant food
  15. Tea bags
  16. Hot chocolate - 1 bar
  17. Hot breakfast drink pack from Cuzco containing local grains - excellent buy!
  18. Raisins
  19. Oats
  20. Jam (sold in blocks)
  21. Instant juice packets. Mix water to make juice.

Clothes list for one person, male or female

  1. Quick dry pant, 1
  2. T-shirt for hiking, 1
  3. Fleece pant for sleeping, 1
  4. Synthetic base layer shirt, 1
  5. Synthetic base layer pant, 1 - available at REI
  6. Rain pant
  7. Rain jacket
  8. Fleece shirt
  9. One extra t-shirt - optional
  10. Innerwear - as required

Gear:

  • Tent
  • Sleeping bag
  • Sleeping pad
  • Stove
  • One pot for cooking. Utensils. Plastic cups for drinking hot/cold.
  • Gas canisters
  • Matches

Other very helpful items to have:

  • Large plastic bag to cover the tent fly as it gets wet in the rain
  • Hooks/carabiners outside the pack to strap things
  • Camp slippers
  • Fingerless gloves
  • Minimum toiletries
  • Spare camera battery
  • Candy is great to carry handy
  • Small empty water bottle. The water in TDP is amazingly tasty and refreshes immediately, so no need to carry water.
  • No need for plates - can eat from pot directly.
  • Many plastic bags for rain proofing
  • Hiking poles
  • At least one pair of quick dry clothes


Torres del Paine / Chilean Patagonia for Indian Citizens


You might wonder why I titled this post "Chilean Patagonia for Indian Citizens". Torres Del Paine national park is one of South America's most visited national parks with good reason. It brings to mind the image of rugged, uninhabitable terrain that only a few have conquered, windy weather, wild horses and glaciers. Its extraordinary beauty can only be experienced and visiting this place is one of those memorable moments that sticks to you for a long time.


However, an Indian backpacker who prefers overland travel to air travel will not find Torres Del Paine a straightforward place to visit.

The only roads leading to Torres Del Paine are from
a.       Punta Arenas
b.      From Argentina

There are no roads to TDP from Santiago which do not traverse into Argentina.

·         An Indian backpacker wanting to travel to Torres Del Paine by land should have not only a Chilean visa but also an Argentinian visa.
·         If you want to visit the rest of Chile, Torres Del Paine and Argentina, this will require multiple entry visas for BOTHcountries. This only applies to those who want to do overland travel.
·         If you only have a Chilean visa (like we did) and want to visit Patagonia, the only way to do so is to fly to Punta Arenas from Santiago. Bus travel was out of the question  as we did not have a visa to Argentina.

Punta Arenas

The super friendly owner at Don Santiago hostel  helped us book our tickets to Punta Arenas via LAN online.  Once you arrive at Punta Arenas airport, there are buses outside that will take you to the center of the town. Once there, you can get to your hostel and start preparing for your trip to Torres Del Paine.

Punta Arenas is a good place to stock up on groceries. The Unimart here is well stocked with groceries. We bought candy, cookies, dried noodles, dried pasta, nuts and dried fruits etc for the w-trek. The food choices for vegetarians in Punta Arenas were slim pickings, but I did come across on vegetarian restaurant that was closed for the weekend. Sigh! Only in South America do we find restaurants in tourist destinations closed for the weekend.

We stayed at the Blue House hostel, an Israeli bastion with mostly Israeli backpackers and signs in Hebrew and cooked at the hostel.

Isla Magdalena

From Punta Arenas you can go on the boat tour to Isla Magdalena and see the Penguins. This is as south as we've ever been in our lives. To our very pleasant surprise, we bump into a very friendly Indian couple from Bangalore, of all places, on the boat. Priya and Rohit live in Santiago with their dog and were enjoying a vacation to Patagonia. It was a very fun and pleasant way to spend an afternoon. The penguins are very very loud and were molting when we were there.


Punta Arenas to Puerto Natales

There are many bus companies that ply buses between PA and PN. We used Fernandez Sur for …

By now, we're used to finding hostels after arriving at a town/city. Once we got here, we just walked around the central area and looked for hostels. We found a great cheap one at Refugio Esmeralda. Just a block from it is a convenience store with all essentials - El Virgel.

Puerto Natales is a typical trekking town. You will find people walking around with extra large backpacks either going to or return from treks in TDP. It lives and breathes TDP. Every second store is an outdoor outfitter or rents/sells camping equipment. And then there are nice restaurants to celebrate your return from the trek.

If you want to do the W trek or the full circuit, head to Erratic Rock hostel for their daily briefing. It is a great information session that tells you how to do the trek. You can rent equipment from them, but we got ours from a shop here (use satellite view)  and we got excellent rates for good quality gear.

Enquire around the shops in the centro area about things like gas canisters for stoves, last minute food purchases etc. We packed our backpacks for the trek, purchased tickets to Puerto Natales, rented our equipment and left the remaining stuff at the hostel. Off we go to the W trek, something I've been dreaming about for years.

Some pictures from the W trek:


Thursday, April 25, 2013

W trek, Torres Del Paine, Patagonia - a slow hikers itinerary


To my utter chagrin (and inspiration), I only encounter super fit hikers where ever I go. Why is that? I am the slowest hiker on the trail and never the fittest, so the timings other people quote never applies to me. So here is a very slow and relaxed hikers guide to the W trek in Torres Del Paine National Park, Patagonia, Chile. I also drew a map showing what's what. It felt great to be able to complete the trek and the next few posts will be about how to accomplish this.


Day 1 - Puerto Natales

  • The bus from Puerto Natales picked us up at our hostel in the morning (I think 8 AM) and drove us to the national park entrance, where we paid our entrance fees of 15000 chilean pesos/person. The bus ticket from Austral Glacier cost 12000 chilean pesos/person.
  • Continued on the same bus to the Catamaran @ 12000/person to Refugio Paine Grande
  • Hiked from 12.30 PM to 6.40 PM
  • Arrived at Refugio Gray around 5 PM
  • Camped at Las Guardas
  • Rained all night!
  • Be the last to enter so that you can get to your backpack first.
  • Pay catamaran fees on the boat itself. 


Day 2 - Las Guardas campsite

  • Broke camp very late. Very rainy and wet
  • 1 hour walk back to Refugio Gray
  • 4.25 hours to Paine Grande
  • 2.5 hours to Italiano
  • 7.5 to 8 hours of hiking in the entire day
  • Wet in the morning, sunny in the afternoon
  • No turn-back in Italiano if you arrive late. Free campsite, but clean and pretty.


Day 3 - Valle Del Frances

  • Swami hiked up to the 2nd mirador (~5 hours)
  • Niru hiked up to 1st mirador (~2.5 hours)
  • Left campsite at 4 pm.
  • Arrived at Cuernos at 6.45 PM.
  • Rainy, sunny, windy!!

Day 4: Cuernos campsite and view of the Cuernos

  • Longest day of hiking!
  • 10.15 AM - started from Cuernos campsite
  • 2 PM - Arrived at shortcut to Chileno refugio (after one large uphill climb and a downhill. Lot of flat walking after the shortcut, followed by steady uphill)
  • 5.00 PM - arrived at Chileno campsite
  • 6.45 PM - arrived at Torres campsite (mostly uphill)
  • Camped @ Torres campsite

Day 5: Torres Campsite

  • Woke up 4.40 AM to view sunrise at Las Torres, the parks most popular view point.
  • Started walk at 5.45 AM (did a small bit of packing)
  • Reached las torres at 6.50 AM
  • very cloudy and very uphill; could not see the torres at all; very disappointed
  • Returned to campsite, packed and left at 9.15 AM
  • Reached Chileno at 10.15 AM
  • Arrived at W trail entrance @ 12 PM
  • Bus to Puerto Natales at 2.30 PM

Monday, July 30, 2012

Losing our valuable belongings - Part 2

Getting the Police Report

We were resigned to the fact that our things were lost and had to figure out what to do next. We were stuck in Calama for the time being and had to wait at least until we got the copy of the police report. And as luck would have it, it was a Saturday. Who will give us a police report on Sunday? I thought we'd get the same day - all I knew thought the police report was that it is a document that will probably be signed by the officer who answered the call. Apparently that is not the case. The police report is not issued by the police, but by the Fiscalia which is housed in the building next door. The Fiscalia is like the district attorney's office and we were told by the smiling police officer who said with a shrug that we cant get the report that day and that we can only get it the next day. The next day was Sunday! He insisted the fiscalia is open on Sunday, but I had my doubts. We now had no choice but to spend the night in Calama. There isnt much to do there either. Even if there were, we were simply not in the mood to do anything. Using our smart phone, we checked emails, called the insurance company, informed our families and bunked down to spend the day and the night.

Newspaper ad for stolen Green Card

We read online that in order to replace a stolen green card, we'll need a copy and the receipt of a newspaper ad that we place in the local daily where the green card is lost. We couldn't get a confirmation about this from the US embassy, so we decided to give it our best shot and get an ad placed anyway, as we didn't want to return to Calama for this alone. Unfortunately, the ads desk was already closed. While we didnt place an ad, we managed to get the story published in the local newspaper! (details soon...)

Getting the police report at the Fiscalia in Calama

The following morning after day 0, our main goal was to get our police report so that we could be on our way to Santiago to apply for a replacement passport. When we reached the fiscalia, we were told that we would not get our reports today (it being sunday) and that we would have to come again on Monday. We were incredibly frustrated, but were determined not to give up. We walked back and forth between the police station and the fiscalia (there was only a rather stubborn front desk person there) and they were only pointing fingers at each other. At our wits end, we decided to beg, demand and do whatever works. This involved me at one building, swami at the other building, both trying our best persuasive hats. This was compounded by our inability to communicate all this in Spanish. All I ever learnt was "where can I get vegetarian food?" and now I was struggling to say "nosotros robado mochilla, por favor necessito denuncia - es muy importante, no pasaporte". Just when I was close to tears, the front desk person placed a call and a guy in crisp formal wear showed up from inside the building a few minutes later and asked us in flawless english "Hello, What seems to be the problem?". We were so relieved to speak English that we quickly poured out our story to him. He confirmed that he couldn't give us a report just then, but can scan it and mail it to us the next day. We were not sure if this would happen, but we did get a printout of our police report from the police station just in case its needed (without any signatures or stamps). It turned out that in 2 days, we would get a signed and scanned copy of the police report emailed to us. We are trained to expect bureaucracy while traveling in some countries, and instances like this really make the day. :)

Knocking at the doors of the Indian Embassy in Santiago after business hours

We took the long 22 hour journey back to Santiago to reapply for our passports. We checked out the Indian embassy's website and found that it closes for visitors at 4.30 PM. Knowing how things work in India, we didnt expect to get anything accomplished that day since it was already 4.30 PM. Imagine our surprise when we showed up at the embassy when we were warmly welcomed, served Indian chai and biscuits and the officials chatted with us, getting to know our story and helping us figure out the quickest way to get our passports. They also offered us the services of their printers and copiers in case we needed to print anything for the passport application. And the best part, we got introduced to a fellow tamilian who works at the embassy, who invited us home and along with us wife, shared their wonderful hospitality with us for two days. We got our passports the very next day - which is quite amazing no matter which country you belong to. We had lost our Bolivian visa along with our old passport, so we had to reapply for that too.

Swami and I would play the "lets count our blessings" game. Every time something cool happened on the aftermath of our robbery or we realized we did not lose something, we'd say "at least we didnt lose this or that" or "we would never meet such nice people if we didnt lose our stuff" or "when would we get to ride in a Chilean police jeep?". Such incidents can happen to the most seasoned travelers and we learned our lessons the hard way. Its best to take travel insurance, pack light, make sure you dont carry anything invaluable.  Keep your passport, debit card, credit card and other important travel documents close to your body and hope for the best.

Thursday, November 3, 2011

Chile Tourist Visa for Indian Citizens

Please use this report as a guideline only. Always call the consulate/visit their website for exact requirements, and carry every piece of paperwork you possibly can. 

The Chilean consulate in San Francisco is a small office in the Flood Building at 870, Market Street. When we walked in, there was only one other person before us. I had already downloaded application form and tourist visa requirements from the website. At the consulate, the staff used the same document to verify our documents. Specifically, we were asked for the following documents:
  • Color copies of ALL pages of passport. I took black and white copies for the blank pages, but color for everything else. This is because they dont keep the original passport. We didn't have our color copies of all pages (only had the main page). I had to run back to the FedEx office at 726 Market Street to take copies of our passports. 
  • Proof of income (Bank statement, pay check, letter from Company)
  • Proof of residence in the U.S.A. or VISA for a third country.
  • Hotel reservation (Hotel’s name, address and telephone number. If staying with family or friends, please provide name, address and phone number).
We were not asked for airline reservations. But I'd call them to confirm or take them anyway. We had no flights in/out of Chile anyway.

After talking to the staff, we faced the following setbacks:
  • We had only one copy of hotel reservations, while they wanted one for each application. The assistant there was very helpful, she offered to make us a copy.
  • The visa will take 2-4 weeks to process. The papers have to be emailed to Chile and the visa will be mailed to the consulate in SF. Since this is the Christmas season, he said this was rush time. After the visa arrives at the SF office, we have to go there to get our passport stamped.
  • You have to enter Chile within 90 days of visa issue. The visa is valid for 2 months from the date of entry. This will be a slight problem for us. For this reason, plan the Chile segment of your trip carefully. And also dont apply too early for visas. 
Updated to add:

After exactly 2 weeks, we received an email that our visas were approved. We were given a date and time to appear for the interview, which I was able to reschedule to an earlier date via email easily. In fact, I appeared an hour late for my stamping and there wasn't a problem. We were finger printed and were given more papers to carry with us for showing at port of entry. The cost is $60/person for a single entry visa and you'll be asked to make a deposit in the Bank of America which is in the next building and bring back the receipt. Some paperwork, signing and thumb printing and we were done in under 2 hours.

Wednesday, November 2, 2011

Tourist Visas To Travel In South America For Indian Citizens

Every Indian citizen who has traveled abroad is familiar with the travails of obtaining a visa to visit most countries in the world. This is true for South America too. When Swami and I first planned our trip, we were caught in the spirit of wanderlust inspired by scores of other travel bloggers. But of course, most of these travel bloggers came from 'western' countries, or countries whose citizens enjoy the freedom to travel to most places in the world without a visa. The reality came crashing down upon us in the last few weeks and I've been prowling the net for accounts by fellow Indians.

The deluge of paperwork, formalities, consular interviews that are more befitting a court of law, the time, money and effort spent in going to consulates can drive anyone insane. And to make things worse, the internet doesnt have a whole lot of information about other people's experiences. Its surely something to bemoan about, but we must consider ourselves fortunate to be able to travel this way in the first place, so we try to take it in stride and do the best we can.

As our date of travel approaches (Dec 4th, 2011), the need for prompt and efficient action is imminent where visas are concerned. Overnight, our living room starts to look like the command central of a records office.  Timing is key. If you get your visas too early, there may be a rule requiring that we enter within 90 days. If you get it too late, then you risk not getting the visa at all. How is one to plan an independent backpacking trip then? Can such a trip still be considered to be in the "its-all-up-in-the-air" variety?

The good news is, my searches on the internet for accounts by similar people have not been futile. There is a great thread on the lonely planet thorntree forums that sees active participation from highly spirited, perseverant and inspiring folks who dont give up in the face of absurd visa rules and regulations that require you to use up the trees! I have also come across some Indian travel bloggers.

So now, I will be adding to that pool of information. I went to SF today and visited the Peru, Chile and Colombian consulate in San Francisco (all blessedly within 5 blocks of each other - 2 in the same building on the same floor) and will publish detailed posts about my experiences at each consulate.


A week in Bhutan - An Overview

Bhutan, India's landlocked neighbor on the north east is slowly and cautiously edging its way into modern life. Its a norm to see board...